
Installing Drumheads on Bomba Drums and Timbas
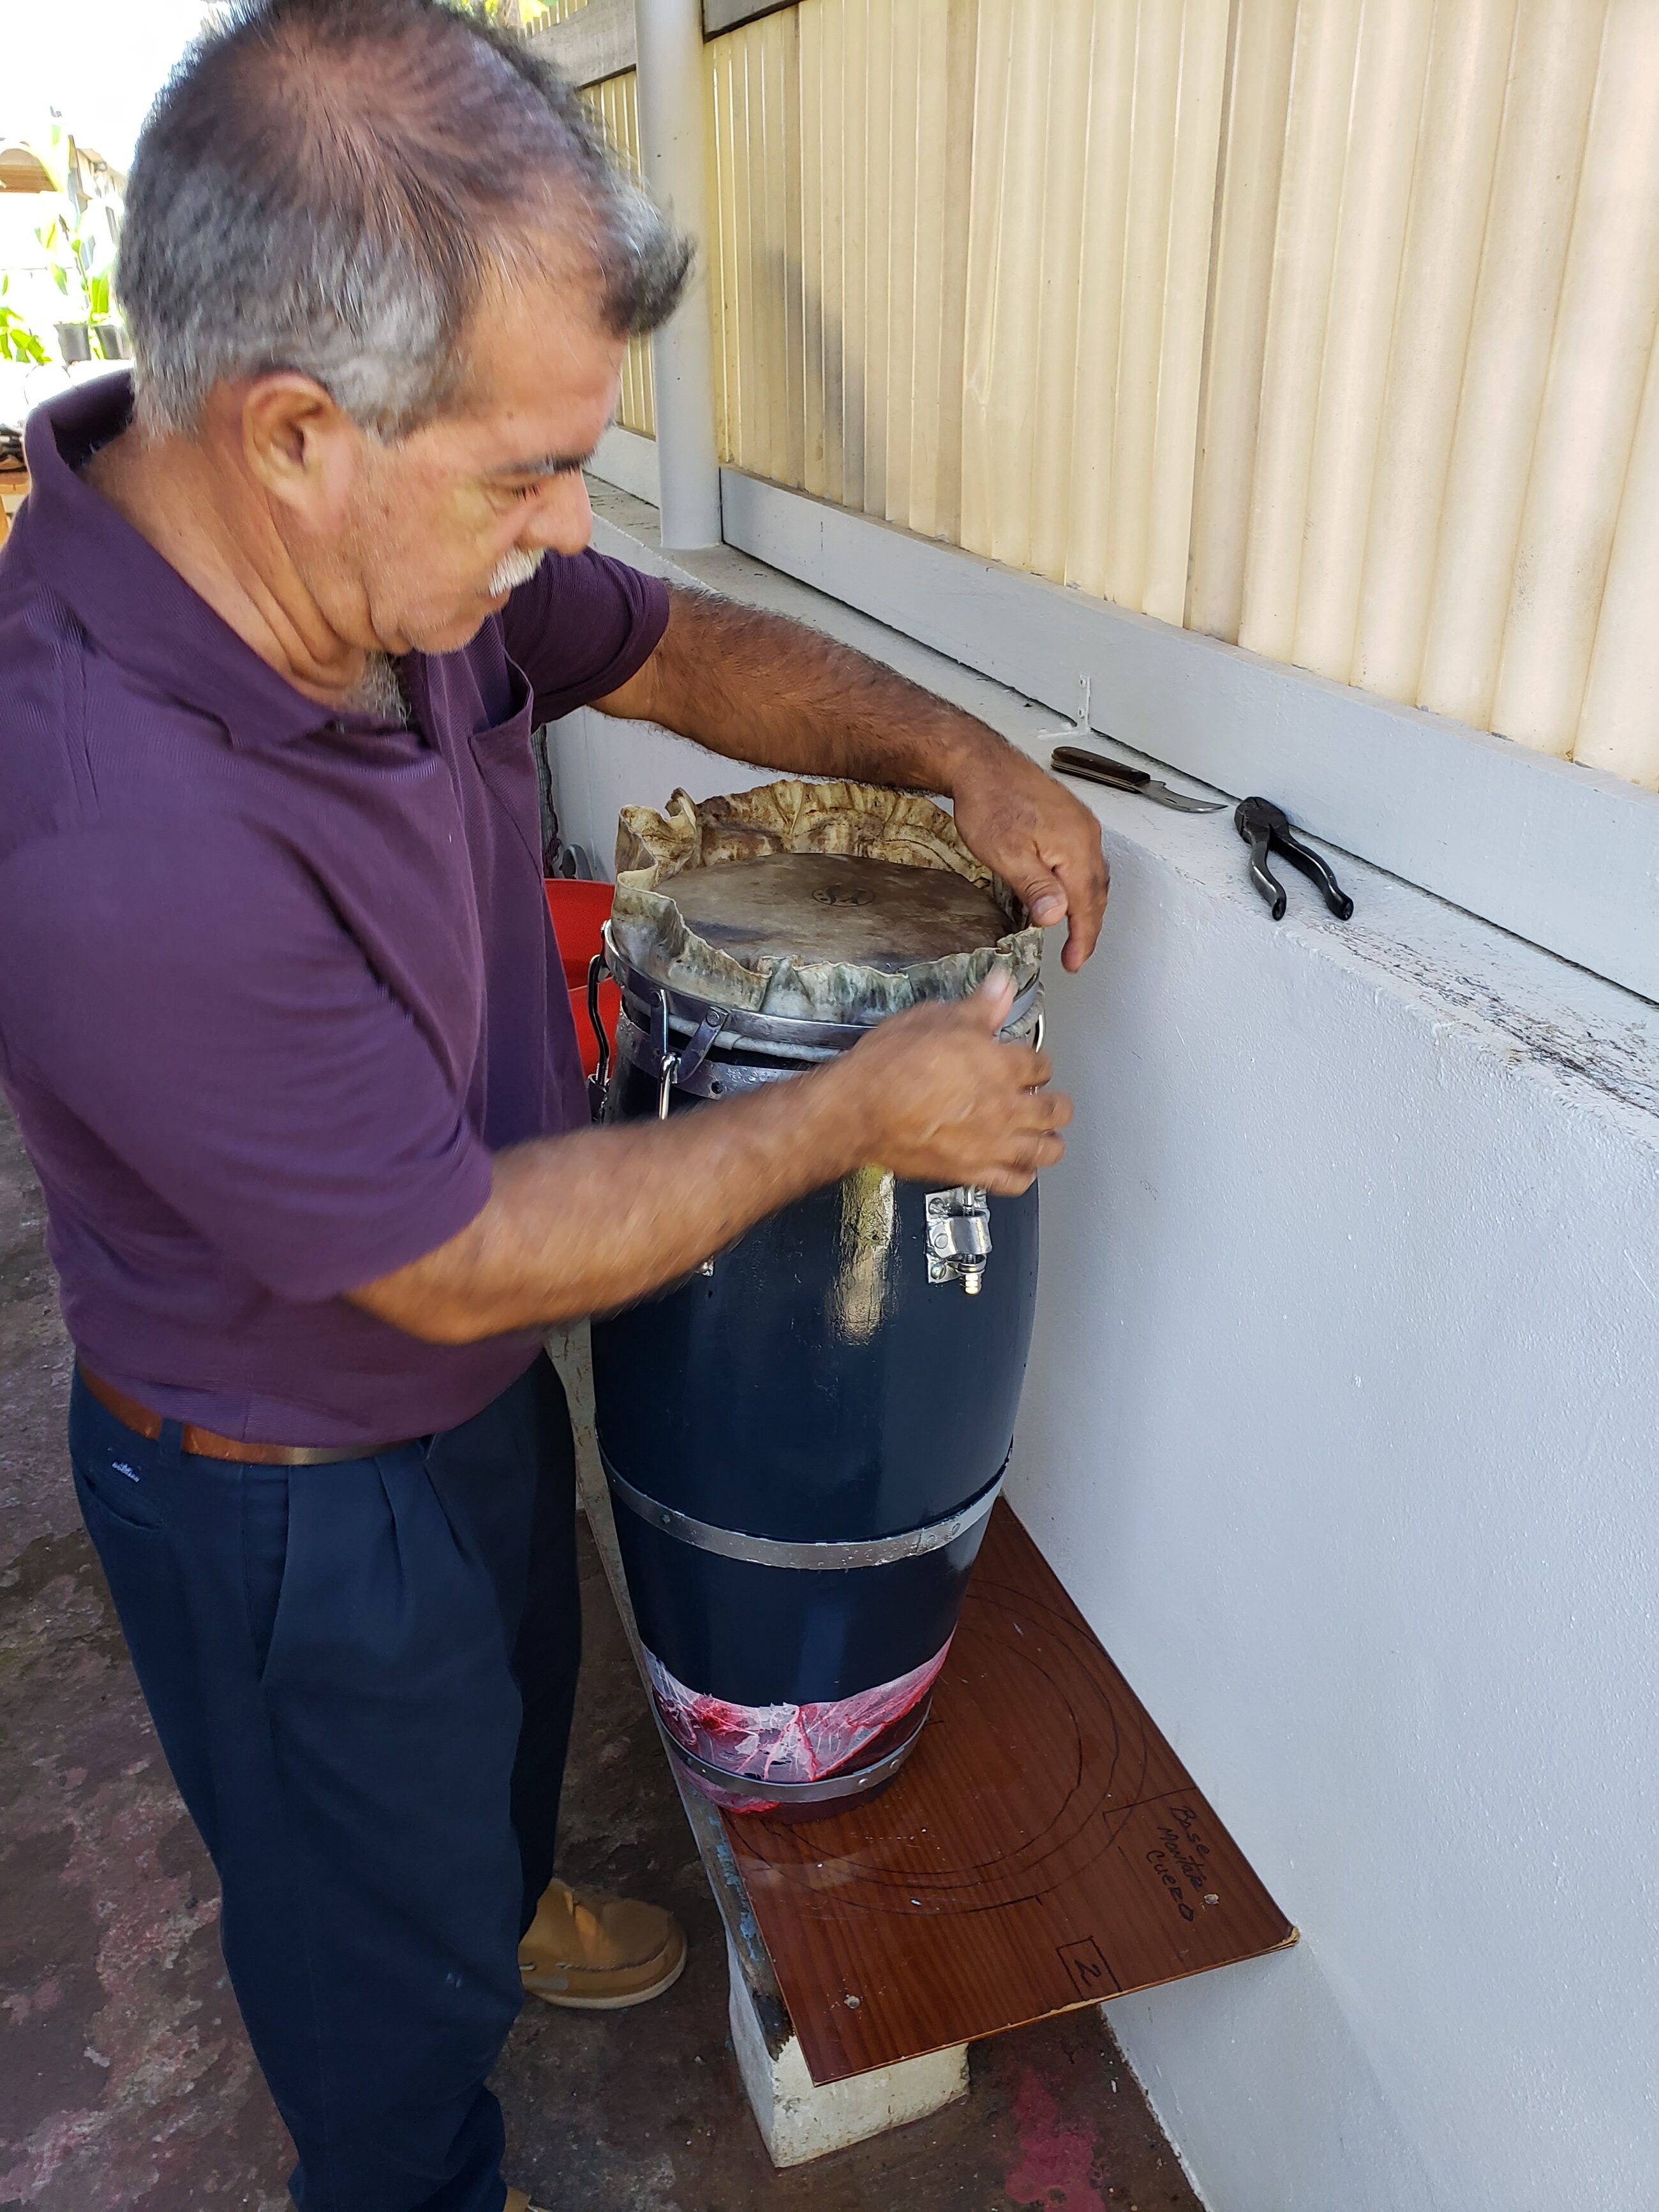
Artisan and Founder of Tambores VL
HOW TO INSTALL DRUMHEADS ON BOMBA DRUMS AND TIMBAS
Technical Guide to Drumhead Installation, Tensioning, and Tuning
Author: Prof. Víctor E. López Valentín (“Chino”)
Bomba Drum Artisan | Tambores VL
INTRODUCTION
Installing the drumhead is one of the fundamental stages in constructing a Bomba drum or timba. This procedure requires preparation, precision, and patience to ensure that the hide is properly installed, leveled, and secured to the instrument's tensioning system.
Proper hide placement, uniform adjustment of the tension rods, and a gradual drying and tuning process are essential for producing a functional instrument with an appropriate sound response.
This guide presents the procedure used by Víctor E. López Valentín in his craftsmanship at Tambores VL.
1. COMPONENTS, EQUIPMENT, AND TOOLS
1.1. Main Materials
Natural Hide
- For Bomba drums: goat hide.
- For timbas: cowhide.
Inner Metal Ring
A metal ring approximately ¼ inch thick. This measurement may vary depending on the instrument's characteristics.
The ring is placed inside the folded hide and helps secure it to the tensioning system.
Metal Hoop with Hooks
This component secures the hide through the inner ring and distributes tension evenly around the opening of the drum or timba.
Tension Rods and Mounting Plates
A system consisting of tension rods, side plates, washers, and nuts that allows the drumhead tension to be adjusted progressively.
1.2. Required Tools
- Container or bucket filled with water.
- Wrench for adjusting the tension rod nuts.
- Pliers or gripping tool.
- Scissors or a sharp knife.
- Clean table or work surface.
2. PREPARING THE HIDE
Step 1. Selecting the Hide
Choose the appropriate hide for the instrument:
- Bomba Drum: Goat hide.
- Timba: Cowhide.
The thickness of the hide directly influences the time required to soften it and make it easier to handle.
Step 2. Soaking the Hide
Fill a container with enough water to completely cover the hide.
Place the hide in the container, ensuring that it remains fully submerged.
Allow it to soak until it becomes soft and flexible.
Important: Soaking time will depend on the thickness and individual characteristics of the hide.
3. PREPARING THE DRUM AND ITS COMPONENTS
Step 3. Aligning the Metal Hoop
While the hide is soaking, temporarily position the metal hoop with hooks over the drum opening.
Verify that the hooks align correctly with the tension rod mounting plates.
Make a reference mark between one of the hoop hooks and its corresponding mounting plate.
This mark will help maintain the same alignment during final assembly.
Step 4. Organizing the Components
Prepare and organize all parts of the tensioning system:
- Tension rods.
- Washers.
- Nuts.
- Side mounting plates.
Ensure that all components are available and ready for installation.
Step 5. Cleaning the Drum Opening
Carefully clean the upper rim of the drum.
Remove any dust, particles, or debris that could interfere with the proper seating of the hide.
4. POSITIONING THE HIDE ON THE INNER RING
Step 6. Identifying the Hide Surfaces
The hide has two distinct surfaces:
Smooth Side: This corresponds to the outer surface of the animal's skin and will become the upper playing surface of the drum.
Rough Side: This corresponds to the inner surface of the animal's skin and will face the inside of the instrument.
Step 7. Preparing the Hide on the Work Surface
Once the hide is sufficiently soft, remove it from the water.
Allow excess water to drain, but do not let the hide dry.
Spread it on a clean table with the smooth side facing upward.
Step 8. Positioning the Inner Metal Ring
Place the ¼-inch metal ring in the center of the hide.
The hide must be large enough to extend approximately 5 to 6 inches beyond the edge of the ring, allowing sufficient material for proper wrapping and securing.
Step 9. Wrapping and Securing the Hide
Position the metal hoop with hooks over the inner ring, ensuring that the hooks face outward.
Begin passing the hide over the inner ring and underneath the metal hoop with hooks.
Continue around the entire circumference until the hide is completely wrapped and secured between both components.
5. INSTALLING THE DRUMHEAD ON THE DRUM
Step 10. Positioning the Assembly
Carefully lift the assembly consisting of the hide, inner metal ring, and metal hoop with hooks.
Place the entire assembly over the drum opening.
Wrinkles may appear in the hide during this stage. This is normal and can be corrected gradually.
Adjust the hide so that the securing assembly sits at least 1 inch below the upper rim of the drum.
Step 11. Initial Installation of the Tension Rods
Begin installing the tension rods to hold the assembly in position.
Make adjustments in a crisscross or triangular pattern, distributing tension among different points around the hoop.
This procedure helps maintain an even drumhead level during assembly.
Initially, tighten the nuts by hand only.
Step 12. Removing Wrinkles
Use pliers or another gripping tool to carefully adjust the hide around the inner metal ring.
Remove wrinkles that may form in the securing area beneath the metal hoop with hooks.
Artisan's Recommendation:
As long as the hide remains wet, it will be easier to manipulate. For this reason, the assembly process should be continuous, avoiding prolonged interruptions.
6. LEVELING AND INITIAL TENSIONING
Step 13. Adjusting with a Wrench
Once all tension rods have been installed and hand-tightened, use the appropriate wrench to begin leveling the hoop.
Make small, gradual adjustments.
Continuously verify that the hoop remains level around the entire drum opening.
The purpose of this stage is not to achieve final tension but to allow the hide to settle properly and conform to the shape of the drum's upper rim.
CAUTION: Do not apply excessive tension while the hide is wet. Doing so could cause it to slip out of the inner metal ring.
7. TRIMMING EXCESS HIDE
Step 14. Removing Excess Material
After completing the initial adjustments, excess hide will remain around the hoop.
Use scissors or a sharp knife to carefully remove the extra material.
If using a knife, cut outward and above the metal hoop with hooks.
Avoid directing the blade toward the portion of the hide that will remain installed.
Step 15. Final Assembly Inspection
After trimming the hide, check the following:
- Hoop alignment and leveling.
- Position of the tension rods.
- Uniformity of the securing system.
- Height of the hide relative to the drum's upper rim.
Make small adjustments only when necessary.
Important: The hide is still wet and should not be subjected to excessive tension.
8. DRYING THE DRUMHEAD
Step 16. Initial Drying
Once assembly is complete, place the drum in sunlight and allow the hide to begin drying.
As moisture evaporates, the hide contracts and gradually develops tension.
During this process, you will notice that the instrument begins to produce sound.
Step 17. Initial Tuning
When the hide is sufficiently dry, make small adjustments to help it settle into its proper position.
Tuning should be gradual, avoiding sudden changes in tension.
9. RECOMMENDATIONS DURING THE FIRST TWO WEEKS
The drying process does not necessarily end when the outer surface of the hide appears dry.
Although the visible surface may feel dry to the touch, the underside may still retain moisture.
For this reason, Víctor recommended:
- Tuning the drum gradually during the first two weeks.
- Avoiding excessive tension.
- Placing the Bomba drum or timba in sunlight for approximately 30 minutes each day.
- Allowing the hide to continue settling before making major adjustments.
Patience during the drying and tuning process is essential for achieving proper drumhead installation.
10. FINAL OBSERVATIONS FROM THE ARTISAN
Installing a drumhead requires special attention to three fundamental aspects:
Moisture: The hide must remain sufficiently flexible during assembly.
Leveling: Initial tension must be distributed evenly around the hoop.
Gradual Tuning: Final adjustments should be made progressively, respecting the natural drying process of the hide.
Together, these elements allow the hide to conform properly to the structure of the Bomba drum or timba.
ABOUT THE AUTHOR
Prof. Víctor E. López Valentín (“Chino”)
Bomba Drum Artisan — Tambores VL
Víctor E. López Valentín developed his craftsmanship through the construction, customization, and tuning of traditional Puerto Rican Bomba drums.
His interest in documenting drum-making procedures reflects his commitment to teaching and preserving the traditional knowledge associated with these instruments.
This written guide forms part of his artisan legacy and serves as a valuable reference for those interested in understanding the techniques he used to create his drums.